Box Hill: Happy Valley Walk in the Surrey Hills

In early January, with a new urge to get fitter, Chris and I went on an excursion to the Surrey Hills. We weren’t quite sure where we were headed but knew that if we kept driving, we would soon find somewhere. Which is exactly what we did.

Deep in the heart of the Surrey Hills is Box Hill – so called because of its box-like shape as it sticks out from the landscape. It was a rather cold day and the ground was sodden from the previous days’ rain. But that wasn’t going to stop us.

View from Solomon’s Memorial
Misty view from Solomon’s Memorial

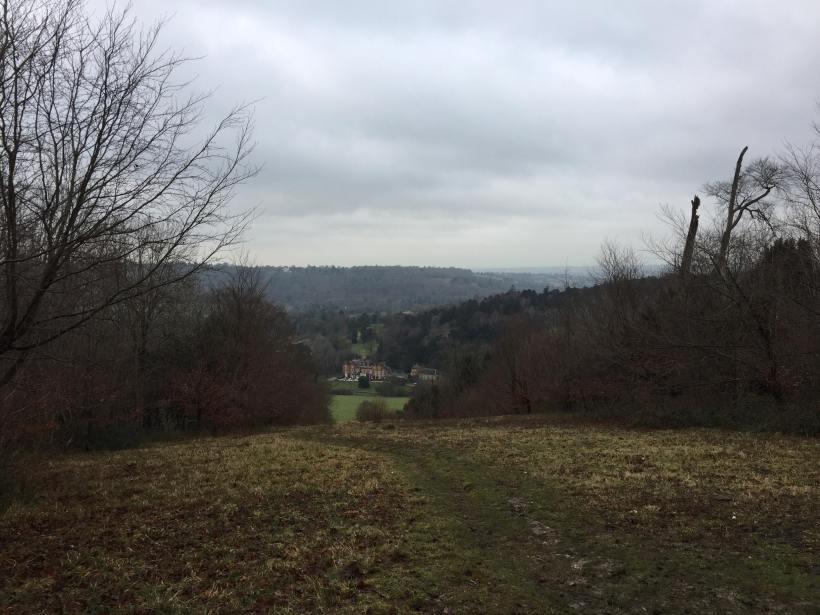
Upon arrival, we first headed to the information point where we decided to make our way towards a viewpoint, or Solomon’s Memorial, that we’d passed on the drive up. Despite the fog, the view was beautiful as we looked down into the valley with Woking sat in its centre.

We began to walk along the hillside, yet it soon became too muddy for us to continue. Turning on our heels, we headed back to the visitor centre where we picked up a number of maps – the Box Hill Hike, Happy Valley Walk, Hill Top Stroll and the Juniper Top Walk.

Hill Top Walk at Box Hill
Walking along the hilltop at Box Hill

Looking at the maps, we felt that the Box Hill Hike may have been a bit too much for that day, whilst the Juniper Top Walk and Hill Top Stroll wouldn’t get us our steps. Therefore, we decided on the Happy Valley Walk.

Starting at the visitor centre, we took a detour to the Box Hill Fort, which was built in the late 18th century when there were fears that London may fall and take the British Empire with it. One of thirteen forts of its kind, it was built as a last-ditch attempt to save the capital of the empire.

Box Hill Fort
Box Hill Fort

Now, the fort is in a state of disrepair, cordoned off and graffitied to its roof. In truth, it was a fairly sad sight. But, it was also interesting to find out about the fears of London being overturned and the lengths that they went to in order to secure it.

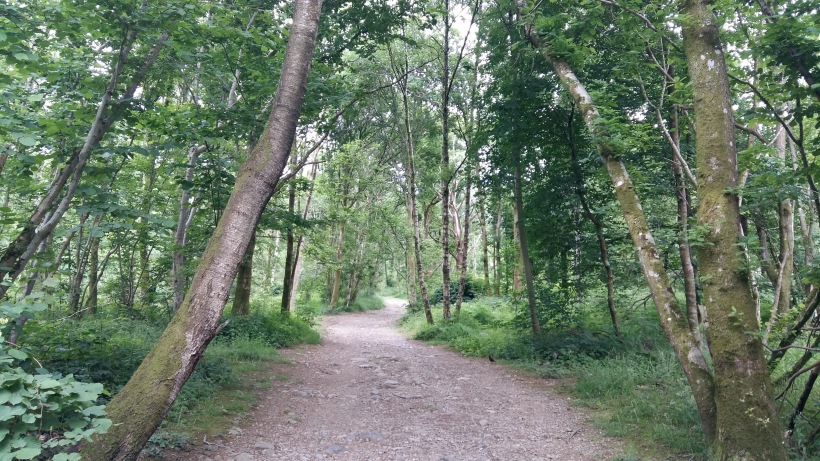
Returning to the Happy Valley route, we passed through the car park and into the dense forest. Here was where it got really muddy. Not wanting to head back again, we slipped and slided our way through the trees.

Through the forest on the Happy Valley Walk around Box Hill
Looking through the trees at the start of the walk

Coming to a clearing, we wandered out to look down from the top of Lodge Hill – a view which arguably rivals the earlier viewpoint. From here, we could see a number of people walking up the side of the opposite hill on what appeared to be a proper path.

view from the Box Hill Hike path
Trying to find a less-muddy path

Keen to not be wading through mud for much longer, Chris started down the valley to see if we could reach the path. However, upon reaching Zig-zag road, we realised that there was a very steep drop and no path on which to walk down.

view from the Box Hill Hike path
Looking over to moody skies

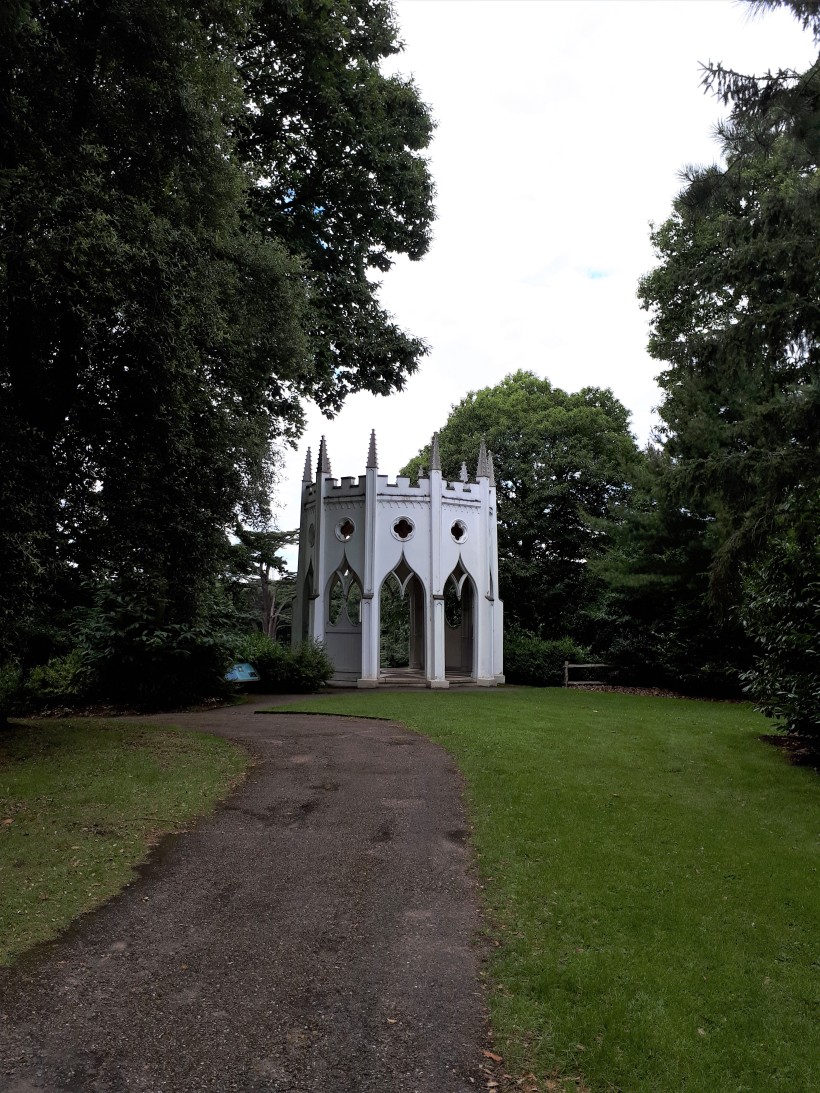
Abandoning that idea, we headed back up the hill and onto Broadwood’s Tower. A really lovely tower, it looked magical surrounded by all of the trees. The tower was built around 1817 as a memorial to the Battle of Waterloo and stands above Juniper Hall, the former Broadwood family home.

Broadwood’s Tower
Broadwood’s Tower

After exploring the tower, we soon came to a series of incredibly steep steps. The mud had not gone away and there were a few moments where things got a little treacherous as we slipped down the valley side. We were concentrating too hard to count the steps.

Juniper Hall, the former Broadwood family home.

At the bottom, it was almost like we’d entered a Black Mirror episode with the absolute silence and eerie dusk that was creeping in. The valley bottom at least was fairly dry and this part of the walk was easy.

At the bottom of Happy Valley

But the hardest part was yet to come. A steep incline takes you back up the hill to Juniper Top. Once again in dense woodland, we joined the Juniper Top Walk that took us back to Donkey Green and the car park.

Walking through Happy Valley

We had  aquick pit stop at the visitor centre before deciding to also incorporate the Hill Top Stroll into our day. The walk took us back to Solomon’s Memorial where we began down the hill to the right.

Solomon’s Memorial at dusk

Navigating in the fading light, we made our way along to Labilliere’s Grave, the gravestone of an eccentric man who had lived in the below town of Woking and requested specifically to be buried in that exact place face down. Definitely worth the trek in the dark to barely see!

Circling round, we ended up back at the Box Hill Fort before returning to the car park and on to home.

Inspired by Italy – Painshill Park

A couple of weeks after my return from France, we visited Painshill Park. A grade I listed 18th-century landscape garden envisioned by the Honourable Charles Hamilton, 9th and 14th child of the 6th Earl of Abercorn. The gardens boast 158 acres of woodland, shrubberies and a vast lake, as well as a large Vineyard.

Inspired by his exploration of Italy and his Grand Tours of Europe, the gardens were one of the first designed in the naturalistic style brought about by the Landscape Movement. There are hints of this influence everywhere, from the Renaissance-style Crystal Grotto to the Chinese Bridge.

It was lunchtime by the time we arrived, so our first stop was the café next to the entrance. We enjoyed fresh sandwiches and a delicious lemon drizzle cake before exploring the walled garden. Teaming with vegetables and a lovely potting shed, it was very quaint, fully allowing us to immerse ourselves in the past.

Walled Garden Potting Shed

There are a number of routes around the park, but we chose the historical route. Naturally, this path led us to most of the main features of Painshill Park – other than a slight detour to the ruined abbey. Almost immediately, we found ourselves looking down upon the Vineyard. Hamilton planted the two and a half acres with Pinot Noir cultivar, as well as Chardonnay and Seyval Blanc hybrids, to produce Hamilton’s Painshill Sparkling Wine. Stretching down the steep hill to the River Mole, the vineyard looked magical in the summer sun. You could easily imagine yourself in the Italian countryside.

Vineyard
Vineyard

Our first time around, we completely missed the Amphitheatre as we wandered through woodland to the Gothic Temple. The temple stands atop the hill presenting us with beautiful views down towards the Serpent Lake and its bridges. Later in the day, we saw a couple having their wedding photos taken there and I can completely understand why!

Gothic Temple
Gothic Temple
Gothic Temple
View from Gothic Temple

Making our way slightly off the trail, we came across the Ruined Abbey. The abbey looked surprisingly new for a ruin and later research revealed that it is, in fact, a mock representation. Nevertheless, the accompaniment of a couple of swans made for some idyllic pictures through the abbey’s arched windows. Not wishing to disturb a group having a picnic too much, we continued along our route.

Ruined Abbey
Ruined Abbey
Ruined Abbey
View through Ruined Abbey doorway

Walking through the woodland and carefully planted gardens, we came out into the open to find the Chinese Bridge. A couple of people were feeding the birds from the bridge meaning the area was teeming with ducks, geese and swans. Making our way through and over to one of the islands, we were faced with the Crystal Grotto. Unfortunately, due to lack of staff, the Grotto was closed on this particular day. All the more reason to come back again!

Crystal Grotto
Crystal Grotto

Undeterred, we got as close as we could in order to see the unbelievable structure. Completely man-made, the crystals were intricately placed to form the cavern by celebrated grotto maker Joseph Lane in 1760. However, during a period when the park fell into disrepair, the grotto roof collapsed meaning a full restoration was required.

Crystal Grotto
Crystal Grotto

In 2013, Heritage Lottery funding enabled Cliveden Conservation to restore the folly, which historically has been recognised as the finest stalactite Grotto in Europe. Hundreds of thousands of crystals – calcite, gypsum, quartz and fluorite – including originals recovered from archaeological works, were skilfully embedded with lime mortar onto a framework of inverted wooden cones, to recreate the incredible stalactite effect of Joseph Lane’s original folly.

I have never seen anything so unusually beautiful. Stunning in its strangeness, the grotto almost looks like skulls eroded together with shimmering chandeliers hanging from the ceiling.


Serpentine Lake
Serpentine Lake

Wishing we could have gone inside, we continued along the historical route passing along the edge of the lake and back into woodland. It wasn’t long before we came across the Waterwheel. Still operative today, the Waterwheel was built by Bramah & Sons in the 1830s to replace the original and is one of the largest working wheels in the UK. It was restored in 1987 and continues to pump water from the river Mole into the Serpentine Lake.

Waterwheel
Waterwheel

Conscious of time, we decided not to visit the Hermitage but instead carry on towards the Gothic Tower through the Alpine Valley. Positioned upon a high-point in the park, the tower’s red brick stands out against the landscape. The tower is accessible to the public and there is a quaint café on the first floor where we stopped for a drink. We then trekked up the many steps, stopping on the various floors to find out more about the history of the park. Upon reaching the top, we were treated to picturesque views of the Surrey countryside – even despite the power lines!


Clambering back down the spiral staircase, we started the loop back towards the entrance passing through the Elysian Plain, which surrounds the Temple of Bacchus. Presumably inspired by Greek mythology, which can interpret the Elysian Plain as a place where heroes were sent when granted immortality, the area is full of colour. Hamilton’s Temple of Bacchus was originally home to a collection of antiques collected during his Grand Tours to Europe. It featured a seven-foot marble centrepiece statue of Bacchus, the Roman god of wine, as well as 12 marble busts of Caesars. However, these pieces were sold in 1797 and the current foundations of the temple are currently undergoing restoration.

Unable to enter the temple, we continued on to the Turkish Tent: another feature of the park that has been recreated. There were no standing remains of the original 18th-century tent, so it was from drawings that the conservationists were able to reconstruct what might have been. With its beautiful blue edges and a fantastic view of the park, we spent a long time taking in the scene.

Turkish Tent
Turkish Tent
View from Turkish Tent

Making our way back to the café, we realised we had some time before the site closed. So we headed back to find the Amphitheatre where Hamilton would have entertained his guests. A cast of Giambologna’s Rape of the Sabines is the main feature which we admired whilst enjoying the late afternoon sun.

Giambologna's Rape of the Sabines
Giambologna’s Rape of the Sabines

Girl’s Trip – exploring Anglesey Part 2

This is Part 2, read Part 1 here.

Day 3 presented us with grey skies and drizzle. Thankfully, we were all feeling the need for a rest day. The worst of the rain was waited out “playing” snooker in the games room, reading and doing jigsaws. Because, yes, we are all old ladies.

View of Beaumaris Pier
Beaumaris Pier

Yet, a chilled morning gave us chance to book our cruise to Puffin Island in order to spot, you guessed it, some puffins! Our plans for the next day sorted, we headed into the pretty seaside town of Beaumaris where we had a lovely meal at the George and Dragon.

View from Beaumaris Pier

Wandering the streets, we window shopped and admired the multi-coloured houses along the seafront. Eventually making it to the pier where I remember crabbing with my Dad and sister many many years ago, we were mesmerised by the hundreds of jellyfish floating past. We must have spent an hour spotting the Lion’s Maine jellyfish as they floated past.

Colourful houses of Beaumaris

Luckily, we arrived back at the car just before it started to rain. Upon our return to Henllys, we continued to enjoy the games room and taught a couple of our friends how to play chess on the giant outdoor board. We made full use of the swimming pool, sauna and steam room again that evening.

Looking out from back of the boat

The next day was once again a little miserable but we had booked onto the Puffin Island boat trip at 11am, something we’d been saying we needed to do since day 1. I would highly recommend the Seacoast Safaris. Their skipper was informative and intent on giving us the chance to see some Puffins – even circling out to sea in chase of these tiny birds.

Puffin Island
Puffin Island

We learnt some of the history of Anglesey and the Menai Strait, but the main focus was the many seabirds living on Puffin Island. From Cormorant to Kittiwake, the island was teaming and we almost ticked off our check list. Upon reaching the island, the boat slowed so we could squint to see the seabirds – scanning for any puffins. In doing so, we caught a glimpse of a seal resting below the rocks.

Puffin in the sea
Can you spot him?

You could sense the passion of the skipper as he meandered out to sea spotting puffins flying above and bobbing on the surface. We must have seen about twenty or more! Definitely impressed. Returning to the shore, we were all a little frozen so warmed up back at the apartment before playing some more chess and board games. A lovely last full day.

Trwyn Du Lighthouse
Trwyn Du Lighthouse

Our actual last day was spent playing more chess and board games before the long journey home. The sun had decided to join us again making for a beautiful departing view and even an ice cream once we were in Chester! All in all, a wonderful holiday spent with my best friends in a beautiful place.

View from HPB Henllys
HPB Henllys
HPB Henllys
View from HPB Henllys

This is Part 2, read Part 1 here.

Returning to the North – Arnside Knott

The last couple of months have been incredibly busy, lots of new things have been happening in my life and I’ve spent a lot of my time travelling – but only so I can write lots of wonderful posts for you! Paris, Anglesey… but first I’m going to take you back to North West England and Arnside.

I returned to Lancaster to see my friends from university and get a taste of that lifestyle once again… as well as go on a little hike up Arnside Knott. Despite living in Lancaster for three years, I had never been to Arnside, which is only a short train journey away. Close to the beautiful Silverdale, Arnside is a quaint little place with a lovely view out over Morecambe Bay.

Moody skies looking back to Morecambe bay and Arnside Railway

Upon arriving at the station (after a frantic dash in Lancaster – it wouldn’t be us if we weren’t late), we set off immediately up a footpath that climbed from the flat shoreline. We had to chase after my friend, Dave, who claimed he knew exactly where he was going. Before getting us completely lost.

Thanks to Google Maps, we managed to work out the route, backtracking on ourselves hugely before realising we could have simply crossed over the field. It was definitely one of those days.

But eventually, we were on the right path and climbing the steady slope of the hill. Despite not being the highest elevation at only 159m (522ft), you still get incredible views across to South Lakeland, the Kent Viaduct and Morecambe Bay.

View of the Kent Viaduct from Arnside Knott

View from Arnside Knott

View from Arnside Knott

It was a beautiful walk and one in which you could easily spend hours exploring all of the detours and meandering paths across the hilltop. There are various viewing points along the way highlighting what you can see in the distance, including the Old Man of Coniston, Crinkle Crags, the Helvellyn range and Skiddaw. The cloud was low, however, so we could not quite see the more distant fells- which still didn’t make the view any less beautiful.

View from Arnside Knott View from Arnside Knott View from Arnside Knott

Along the way, we found many piles of logs from which we fashioned a group of walking sticks and a den that I promptly got stuck inside… it’s the perfect place to bring children to run around and play in nature. The area at the top of Arnside Knott is pretty wide, with much to see and explore. We could have wandered for hours, if it wasn’t for our need of coffee and to return to Lancaster for the Warriors celebrations (a sporting event between Lancaster University’s colleges).

View from Arnside Knott

We descended via a different path which took us along the opposite side of the fell and trekked through bracken before reaching the road into Arnside. It was time for a quick stop for some well-deserved coffee and cake at the lovely Ramblers Café and Take-away.  The café itself is pretty small, so good luck getting a table! But it is well worth it if you’re able. They have a huge selection of coffees and delicious food, which I definitely need to try more of!

View across Morecambe Bay from Arnside

Despite the weather not being the best, we went to drink our coffees (and teas) on the end of the pier before heading to the train station and home.

Catch other adventures in my Lake District Chronicles here.

My favourite place to holiday: Robin Hood’s Bay

On a recent trip back up north, I visited one of my favourite places in the world: Robin Hoods Bay. It’s a place that always takes me back to childhood camping holidays at Middlewood Farm campsite, which has a well-trodden track down to the beach. The area around the beach is a complete honey pot with cute gift shops, holiday cottages and plenty of places to eat and drink.View from the beach at Robin Hood's Bay
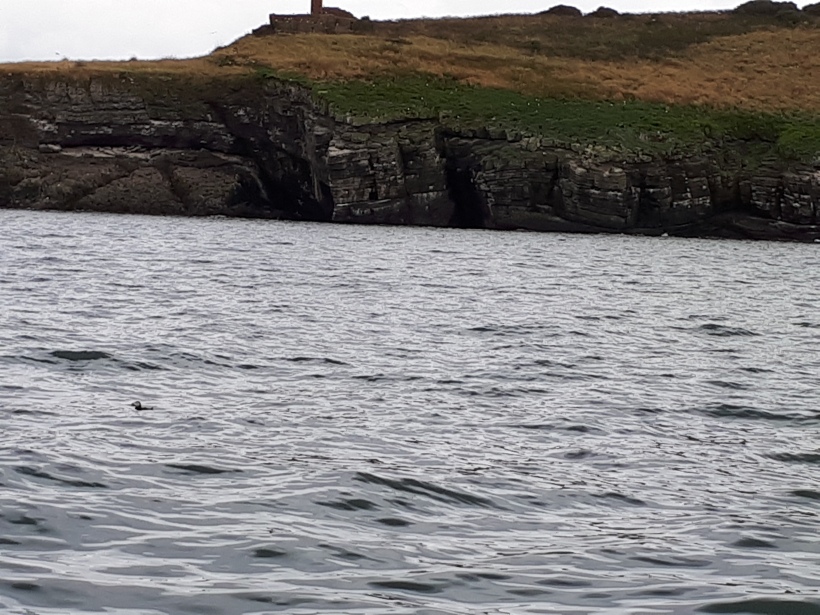
The drive through North Yorkshire to reach the bay, which is close to the seaside town of Whitby, is beautiful in itself, but nothing quite beats the view from the top of the cliffs. There is a carpark at the top of the hill (which is usually incredibly busy) where you can walk down the many steps to reach the beach.View from beach at Robin Hood's BayThe beach is a haven for children and I spent many holidays rock-pooling with my Dad and sister, finding crabs and anemones – even a lobster once! This time we stopped for ice cream from the van which is always there and it was wonderful. We sat with the sea creeping in and the last families packing up their beach towels in time for tea. View from the cliff top at Robin Hood's BayAfter eating our ice creams, we went to discover whether our favourite place to eat was serving. Unfortunately, a Tuesday evening after a bank holiday Monday, Ye Dolphin was only offering drinks. We still sat in the lovely old bar lined with beer bottles and quirky pictures, taking in the atmosphere. Beginning to feel hungry, we wandered through the cute back alleys between holiday cottages back up the hill to eat at the Victoria Hotel, which has a beautiful view along the coastline.View back towards Robin Hood's Bay

Fed and happy, we headed back home, stopping to take in the view as we went.

Lake District Chronicles: 8

Fearing a torrential downpour, we decided not to do the full route pictured on the map and find our own way back to Keswick – which in hindsight was not very wise.

Skimming Stones in the rain: Keswick to Walla Crag

It was about this time last year, I had finished my final exam of third year at university – and it was all over! So, we decided to celebrate with a trip to the Lake District. I had picked up a map on directions from Keswick to Walla Crag the previous summer, and was yet to try it. Therefore, we set off on a fairly cold May day to Keswick.

Walla Crag Route Map

After stopping to buy some lunch at the local Booths, we wandered through the centre of town to reach Keswick’s Town Hall and Tourist Information Centre – the start of our walk. Following the same route to the Castlerigg Stone Circle, we were soon in open countryside with Derwent Water far below us. Climbing through trees and fields, we spent a lot of time stopping to take photographs despite the overcast sky.

Woodland on our path to Walla Crag
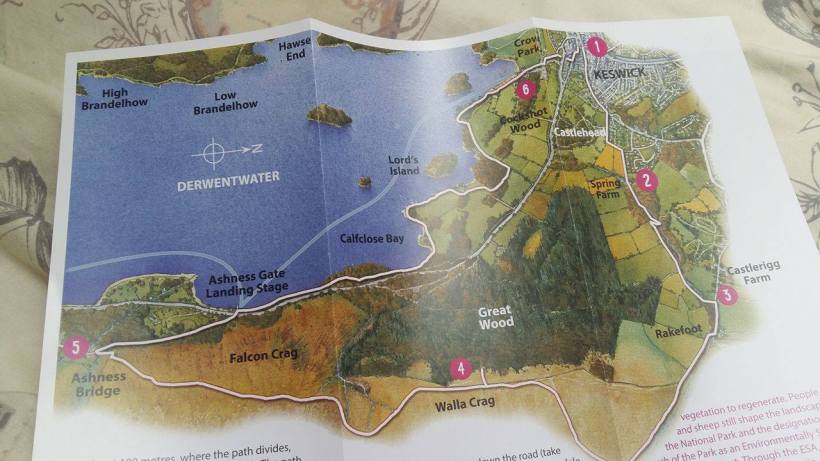
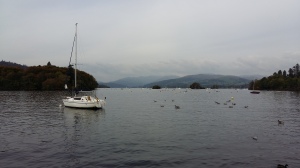
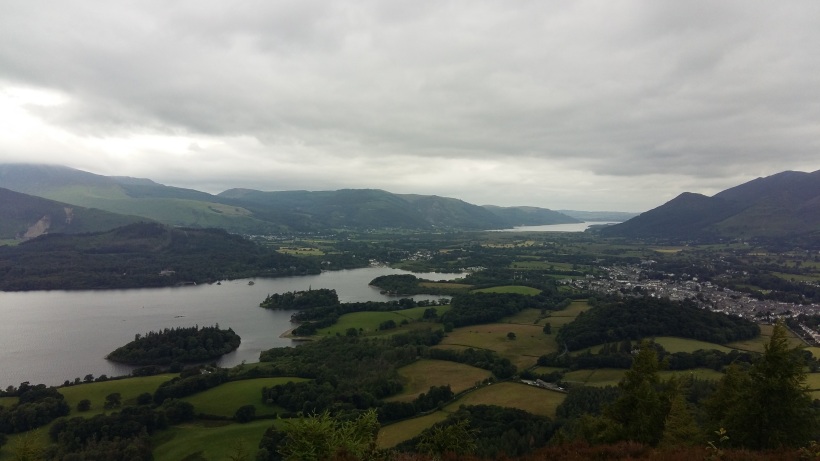
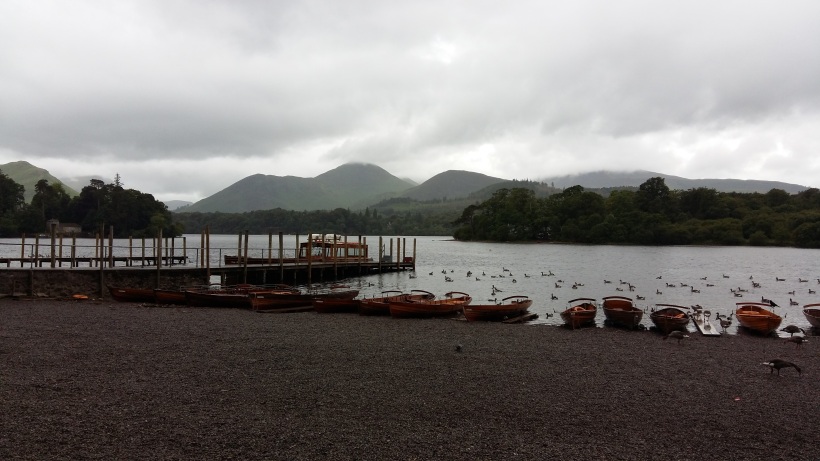
However, we soon came to a dilemma. I had been so busy enjoying the walk, I had unwittingly led us the route of Castlerigg Stone Circle and we needed to fall back on ourselves to reach the correct path. Not exactly as planned, but the slight detour was worth it for the fantastic views across Derwent Water and towards Blencathra and Skiddaw.

Looking towards Blencathra

Upon reaching the ascent of Walla Crag, we realised that we had misjudged the gradient and, for an easy walk, it was pretty steep! We followed the path around to Surprise View, which gives an amazing panoramic view across the whole of Keswick and Derwent Water. But now the rain was creeping in as the clouds darkened and spots of rain formed on my glasses.

View from Surprise View
Surprise View

Fearing a torrential downpour, we decided not to do the full route pictured on the map and find our own way back to Keswick – which in hindsight was not very wise.

We followed a less traversed path along the side of one of many stone walls that section the Lake District’s landscape, before reaching an even steeper descent. With the sound of a waterfall nearby, we attempted to navigate the ill-formed path, jarring knees on too high steps and slipping on loose gravel as the rain began to fall more heavily. Reaching the cover of some trees, we sought a quick break to recharge the batteries and nurse an injured ankle. Mosquitos had found us, however, and came in droves, driving us to keep moving as we continued our descent.

Descent from Walla Crag

Making our way through the Great Wood, we found ourselves at the edge of Derwent Water. The rain was coming down thick and fast by this point – perfect weather for skimming stones of course! It became the mission to find the best stone to skim as we dodged along the banks using the trees as cover.

Looking out across Derwent Water

Eventually, we gave in to the inevitable and enjoyed the rain, seeing how far we could throw our rocks and collecting the best as we went. All too soon we were making our way back into Keswick, where we found a café for a hot drink to warm us up as the rain still fell.

Returning to Keswick

It was the weekend of Keswick Midsummer Festival, so we sat for a while in the shelter listening to the acts and watching those stood in the rain getting drenched – but really, what did they expect in Cumbria? Some of the acts where pretty good and we would have liked to stay longer, but were restricted by the bus timetable.

We returned to Lancaster looking like drowned rats but perfectly happy with our little adventure.

A 10 mile “wander” around Teddington Lock

A gorgeous 16C caught me by surprise when I went for a walk yesterday. The sky was grey and I’d worn my thickest jacket thinking it would be cold – but it was glorious!

I’ve lived in Teddington for three months now so felt it was high time I explored the lock, which is only a mile from my house. Perfect for a short wander to clear my head. Or so I thought.

20170506_153610
Teddington Lock

I have a wonderful, if not slightly reckless, habit of finding myself in places where I can lose myself completely, which naturally leads to never quite wanting to leave again. This was one of those occasions.

Upon reaching the lock, which is a quick wander down from Teddington high street, I found that hundreds of other people had had much the same idea. The nearby pubs and tearooms were teaming in the bright sunshine that had luckily broken through the clouds. People were out in force on the water, on boat tours or yachts, a family came past in bright orange kayaks and there were a number of barges and rowing boats spotted along the way.

20170506_153706
Teddington Lock

There are two bridges across the lock and, to avoid a group of cyclists, I decided to explore the base of the first bridge. All I found was an overgrown footpath and a dead end, but the smell transported me back to Yorkshire and wandering through the countryside. I found myself encased in wildflowers, their scent filling my nostrils and taking me a million miles away. Yet, a gate prevented any further exploration and I had to return to the bridge.

20170506_154028
Half-way point

After crossing, I was faced with a decision: 3 miles to Richmond Park straight ahead, 3.5 miles to Ham House and Gardens to the left, or 1.75 miles to Kingston Bridge to the right. At this point, I was still convinced this was just a short wander along the river, so chose the Kingston path.

The path divides in two with one strand following closely to the banks of the Thames, the other is a sturdier path further up the bank. I chose the higher path, which took me through woodland before emerging into the open sunlight with views of the river.

Taking pictures as I went, I meandered along the path listening to the sound of the river mixed with children’s laughter and the chitter-chatter of their parents. Until I reached a line of houses where the path turned into a tarmac road. Not really wanting to wander through Kingston, I decided to head back but, this time, I took the lower path.

20170506_160626
Half mile tree, just before Kingston

Now my view was less obstructed, I could photograph the expanse of the River Thames with the sun now on my face. Having only traveled a mile or so, it wasn’t long before I was back at the signpost. To go home, or not to go home?

20170506_162045
View back towards the lock

Not to go home.

I decided to continue along the path towards Ham House and Gardens, not expecting to reach the stately home but knowing the walk would be pretty. After following the edge of the lock, I was soon immersed in woodland. I heard the sweet calls of blackbirds and robins flitting through the trees. I love being among the trees, it’s a place where I feel safe and at home. The fresh smell of new leaves and various wildflowers intermingled with the earth as I wandered.

20170506_163511
The path to Ham House and Gardens

The path is fairly similar the whole way along with the Thames to your left and woodland on the right, which made it easy to lose track of how far I had walked. It wasn’t until I saw the outcrop of Eel Pie Island that I realised I had almost walked as far as Ham House! So much for a short walk…

20170506_163940
Ham land

I sat on a bench for a little while, admiring the beauty of Eel Pie Island and growing envious of the houses there. As I looked, however, I suddenly noticed two little eyes watching me and a couple of pointy orange ears. A fox. Realising I was not a threat – I could not easily traverse the water between us – he settled down to sun himself. I admired him for a while before continuing my walk.

20170506_165920
Eel Pie Island

By now it was getting late and I had set myself a target of turning back once it had reached 5pm. It was 4.54pm. I carried on forward a short way until the woodland opened up to reveal a car park and what I can only assume is the ferry point between Twickenham and Ham House. I could see The White Swan on the opposite bank and Richmond looming in the distance. I sat for a while taking in the view.

20170506_170829.jpg
View towards Richmond

The journey back was harder. My feet suddenly felt the 19,884 steps (according to my Samsung Health app) I’d taken and my lack of preparation meant I was in dire need of a drink. Barely pausing, I power-marched back to the lock, reliving all the beauty of my walk there and being startled by squirrels who interrupted my path.

After walking roughly ten miles, I collapsed on my bed, tired but feeling wonderfully fulfilled.


Off the beaten track: North York Moors

To rise swiftly from the valley of cars,
Scything the heather in mud-spattered arcs,
With boots crushing broken straws of bracken,
In peat which darkly preserves our passing,
– Christopher Woodall

After my stay in Leeds, I travelled across to my hometown of Hull to see my family. Whilst I was there, we decided to head out to the North York Moors on an, unfortunately, less pleasant day than my trip to Ilkley.

Image of Daffodils on North York Moors with a river running through trees
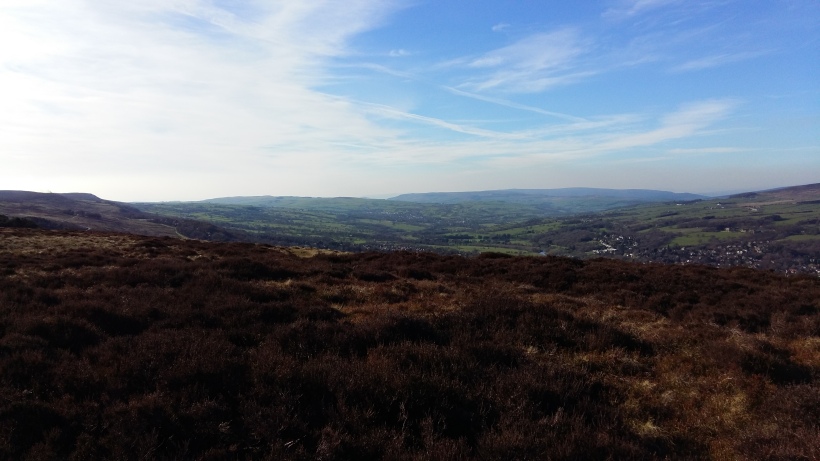
Despite the overcast skies and spots of rain, we had a wonderful exploration of the moors around Rosedale, seeing a part of the landscape we’d never been to before. Wild daffodils were in their droves around the base of trees and little Coal tits fluttered through their branches. It was a little haven away from the roadside, the only pull back to the real world being the slight whoosh of traffic in the distance.Image of river running through trees on the North York MoorsRosedale is known for its beautiful Abbey ruins and remnants of the industrial revolution as the area was used for its richness of iron with ironstone mines, kilns and the moorland railway scattered across the landscape.
Image of River on North York Moors near Rosedale

We wandered along the river bank before coming to a series of stepping stones across to the opposite bank. It was either cross or turn back, so we ventured forward – making sure my mum was in the middle, just in case!

We made it across the river to climb up a Image of View through the pines on North York Moors
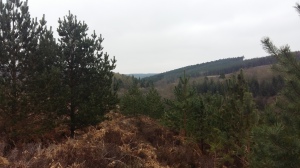
path through the dense heather, our intention to make it to the highest point of the moor. The higher we climbed, however, the more apparent it became that there was no obvious peak and we could continue indefinitely.
Turning back, we realised how far we had gone as we were now well above the trees on the opposing valley.Image of View on North York Moors After returning to the car, we headed to Rosedale where we found a lovely café, the Abbey Tea Room and Store in Rosedale Village. There is a large picture window looking onto the quaint village green and I can highly recommend their gluten-free Chocolate Cake!

The day was drawing to a close, so we took the scenic drive back home passing over the top of the moors and down through the seaside town of Whitby.Image of View on North York Moors

Ramble over Ilkley Moor

Wheear ‘as ta bin sin ah saw thee,
On Ilkla Moor baht ‘at?!
Wheear ‘as ta bin sin ah saw thee?
On Ilkla Moor baht ‘at?!

At the end of March, I travelled to Leeds to visit a couple of my best friends from University. The sun was out so we decided to explore West Yorkshire with a trip to Ilkley Moor.

Image of White Well's Spa Cafe on Ilkley Moor
Looking up to White Well’s Spa Cafe

Despite the very ill-suited footwear (note to self: always bring trainers), we managed to scramble up a muddy slope to reach White Wells spa café. Upon reaching the top, we realised there were two pathways to the café we had completely missed! Google had not lied and the muddy shoes were completely avoidable!

Image of view across the valley from White Well's Spa Cafe on Ilkley Moor
View from White Well’s Spa Cafe

Nevertheless, the view was incredible and we spent a while with our mugs of coffee catching up in the gorgeous spring air. The daffodils were in full bloom and everything seemed bright and fresh in the early afternoon sun.

The path continued on from the café, which also houses an old bath house we decided not to take a plunge in! The view just got better as we climbed higher onto the moors and after walking for a while we saw the famous Cow and Calf in the distance.

Image of White Well's Spa Cafe on Ilkley Moor
White Well’s Spa Cafe on Ilkley Moor

The Cow and Calf are a large outcrop of rocks sitting high on Ilkley Moor, so named because one of the boulders is large, with the smaller boulder sitting close to it, like a cow and its calf. However, we agreed that it definitely takes a lot of imagination to see this!

According to local legend, the Calf was split from the Cow when the giant Rombald was fleeing his wife and stamped on the rocks as he leapt across the valley. The legend also states that his angry wife dropped the stones she held in her skirt to form another local rock formation, the Skirtful of Stones.

Image of view towards Ilkley
View towards Ilkley

We were still a good way away and it was already mid-afternoon, so we decided to head back the way we’d come, dodging the puddles and tackling some rather precarious steps along the way. Descending by the marked path, we reached the road into Ilkley. We wandered through the quaint high street before finding another café to sit and talk for hours until heading home for pizza and movies – because, of course, we had earnt it.

Image of View from Ilkley Moor down towards Ilkley
View from Ilkley Moor down towards Ilkley

Lake District Chronicles: 7

I had become interested in Wainwright and his exploration of the Lake District so settled on Orrest Head as our destination – the view from which sparked Wainwright’s decision to extensively map out all of the fells.

Bowness-on-Windermere and Orrest Head

“…quite suddenly, we emerged from the trees and were on a bare headland, and, as though a curtain had dramatically been torn aside, beheld a truly magnificent view…” – Alfred Wainwright

Image of trees along Sheriff's Walk and Mill Beck
Sheriff’s Walk and Mill Beck

In my third year of university, I made the best decision to become a fresher’s rep. I met a fantastic group of people – who were all interested in exploring the Lakes!

Image of Mill Beck from Sheriff's Walk
Mill Beck from Sheriff’s Walk


As an extension of their Fresher’s Week, I planned a trip to Windermere.

Windermere has often been a connecting point as I journey on to elsewhere in the Lakes, but is just as beautiful – if not quite so spectacular as further north.

I had also become interested in Wainwright and his exploration of the Lake District so settled on Orrest Head – the view from which sparked Wainwright’s decision to extensively map out all of the fells.

Image of Waterfalls on Mill Beck from Sheriff's Walk
Waterfall

However, before climbing the fell, we decided to head towards the lakeside and took a shortcut via a number of hidden waterfalls I had found on a previous trip. The footpath is called Sheriff’s Walk and branches from the main road to Bowness-on-Windermere (Lake Road) and takes you down towards Bowness and Lake Windermere.

The walk was beautiful as we wandered through trees and the autumnal colours, with the constant melody of the river.  There are a number of waterfalls as Mill Beck travels towards Windermere, with a considerably larger waterfall closer to the lake. We enjoyed skipping across “stepping stones” and throwing stones in the clear water.

Image of a yacht on lake Windermere with misty mountains
View from Bowness-on-Windermere

Finally, we reached Bowness-on-Windermere, which was busy even in October. We wandered along the lakeside and sat for a while in the park, enjoying the scene.

The weather was turning, however, so we headed back to Windermere in time to climb Orrest Head. With a few spots of rain and the wonderful smell of wood smoke, we easily ascended the small fell.

Image of View across to Windermere
View across to Windermere

There are some incredible views from various points along the meandering track, which begins across the road to Windermere station. But it is when you reach the summit that you can really see what ignited Wainwright’s interest. For such a small elevation, you can see far and wide – almost every inch of the fells surrounding the Lake District’s largest lake and beyond.

We picked out Scafell Pike and Crinkle Crags; with the distant behemoth of Great Gable just visible despite the cloud. Definitely worth a visit if you’re looking for a quick and easy walk with fantastic views.

Image of View from the top of Orrest Head
View from the top of Orrest Head
Image of View from the top of Orrest Head
View from the top of Orrest Head

View more of my Lake District travels by clicking the Lake District Chronicles above or to the right.